

In October 2019, Apple released macOS 10.15 Catalina. As the latest update to the Mac operating system, it adds plenty of new features like the Apple Arcade gaming subscription service and Apple TV app, and makes useful improvements to photos, Notes, Reminders, and many of Apple’s other apps.
But that doesn’t mean it’s perfect, some problems existing in the previous macOS version remain the same with the latest macOS Catalina. One of them is the incompatibility issues between Microsoft’s Windows and Apple’s macOS. If you’ve ever tried transferring files between Window and Mac using an NTFS-formatted external disk, you might find that you can only view files stored on your external drive but cannot copy and paste or drag and drop files on to this disk. Why is an external hard drive read-only on Mac? This is due to Mac disables write support to NTFS drives by default.
Is there any way to write to NTFS drives on macOS Catalina? The article will introduce four effective solutions for you to write to NTFS drives on Mac.
Fix 1: Format the drive for Mac and PC compatibility
There are file systems well supported by both Mac and Windows PC, and they are FAT32 and exFAT. As long as you format your external hard drive specifically to these 2 file systems, it can be shared between Mac and Windows.
Note: The following method will erase all your data stored on your drive. Please make a backup of your important data first.
1. How to Format the Drive on Mac?
Step 1: Connect the external drive to your Mac.
Step 2: Open Disk Utility. Open the computer window. Open a Finder window, click Applications in the sidebar, double-click the Utilities folder, and then double-click Disk Utility.
Step 3: Select the drive you want to format from the left sidebar.
Step 4: Click Erase on the top.
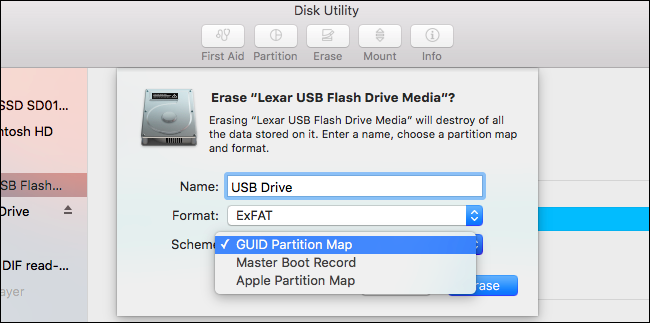
Step 5: Give the drive a name, choose MS-DOS (FAT) or exFAT in the context menu, and then choose a scheme.
Step 6: Click Erase and follow the prompts.
2. How Format the Drive on Windows?
Step 1: Plug the disk into a Windows computer and click on This PC/My Computer at your desktop.
Step 2: Right-click on the drive you wish to format and select Format for the contextual menu.
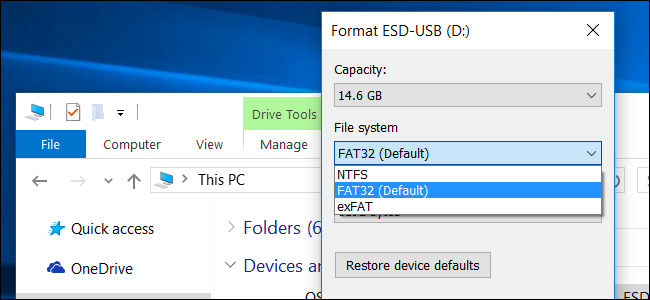
Step 3: Select format (exFAT or FAT32) from the drop-down box and click on Start.
Fix 2: Use a Paid NTFS Driver
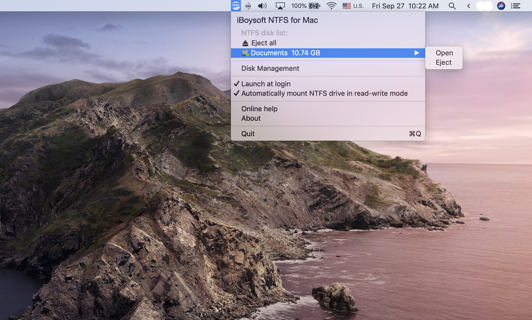
The first method I would like to introduce is to use a paid third-party NTFS for Mac application like iBoysoft NTFS for Mac. The software is easy-to-use, reliable and won’t cost you much money. The software supports an auto-mount function which allows users to mount NTFS drives on macOS Catalina without any manual work. With its assistance, you can edit, copy, edit, move, delete or even move files on NTFS drives from Mac. Additionally, it can be used to check and repair file system errors, erase data on NTFS drives.
Step 1: Download and install iBoysoft NTFS for Mac.
Step 2: Plug an NTFS drive in your Mac. Once the NTFS drive is detected, it will be automatically mounted and a Finder window with its content will pop out.
Fix 3: Use a Free NTFS Driver
FUSE for macOS is an open-source utility you can install on a Mac to give your Mac write ability to NTFS drives. This software is continuously updated and it’s now fully compatible with macOS Catalina.
Note: The process is tediously long and not recommended if you’re not familiar with using Terminal.
Step 1: Download and install Xcode.
1. Launch Terminal by navigating to your Finder > Applications > Utilities > Terminal. In Terminal, enter the following command line:
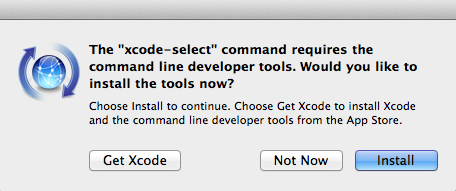
xcode-select –install.
2. Click “install” when you are asked to install Apple’s command line developer tools.
Step 2: Download and install Homebrew.
1. Go to the Terminal window and enter the following command line:
/usr/bin/ruby -e “$(curl -fsSL https://raw.githubusercontent.com/Homebrew/install/master/install)”.
2. Hit Enter to install it (provide your password when prompted).
Step 3: Download and install FUSE for macOS from https://osxfuse.github.io/
Step 4: Install NTFS-3G.
1. In the Terminal window, run the following command line:
brew install homebrew/fuse/ntfs-3g.
2. Hit Enter.
Step 5: Disable SIP (System Integrity Protection).
1. Restart your Mac and press Command + R while it’s booting.
2. Open Terminal from the Utilities menu in Recovery Mode.
3. Type in the command line and hit Enter:
csrutil disable
4. After your Mac successfully disabled SIP, you need to reboot the machine.
Step 6: Read and write to NTFS on Mac.
1. Launch Terminal again.
2. Run the following command line and hit Enter:
sudo mv /sbin/mount_ntfs /sbin/mount_ntfs.original
sudo ln -s /usr/local/sbin/mount_ntfs /sbin/mount_ntfs
Note: To make sure of the security of your Mac, you should re-enable SIP. Restart your Mac and hold Command + R until you see the Apple logo. Then launch Terminal in Recovery Mode and type csrutil enable.
Fix 4: Enable Writing to NTFS Using Terminal
Writing to NTFS drives is a functionality that has been built into in previous OS X. However, it has long been hidden for a long time. That indicates you can enable NTFS write support.
Note: this method has not been officially supported by Apple, so it might report errors, corrupt your data, your disk and cause data loss. Please back up your important data and run the following steps with caution.
Step 1: Go to Finder > Application > Terminal to launch Terminal.
Step 2: In the Terminal window, type in the following command line and press Enter.
sudo nano /etc/fstab
This will open the fstab files using the nano text editor. You will need to enter the administrator password.

Step 3: After that, you will see a new window with nothing. Simply paste the following command.
LABEL=DRIVE_NAME none ntfs rw,auto,nobrowse
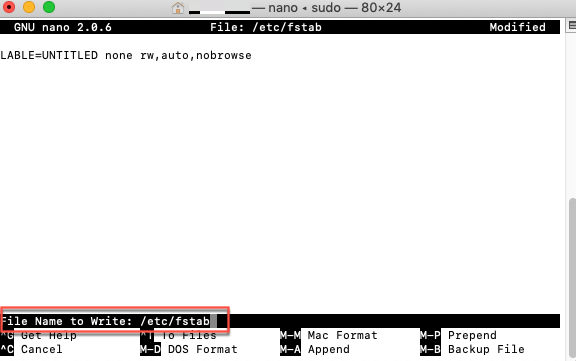
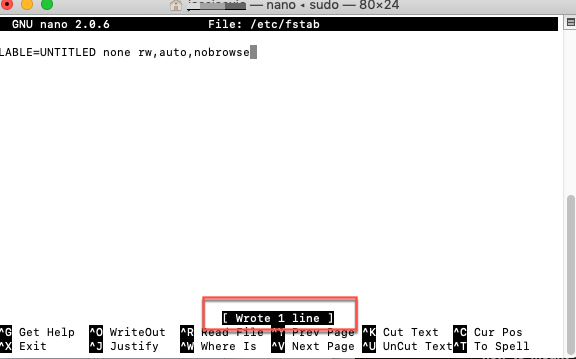
Remember to replace the DRIVE_NAME with your NTFS drive name. Press CTRL + O to save changes and CTRL + X to exit.
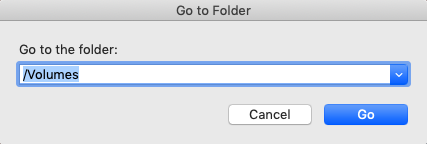
Step 5: Restart your Mac. From the Finder menu bar, click Go > Go to Folder and type in /Volumes. Then locate your NTFS drive and access it.
Conclusion
The cross-platform incompatibility has been a huge roadblock for those who switch between macOS and Windows PC using an NTFS external drive. We mentioned three useful methods to write to NTFS drives in this article. Try out them and you may find the easiest and safest way is to use third-party tools like iBoysoft NTFS for Mac. This program really impresses us with fast file transfer speed.