
UEFI, or Unified Extensible Firmware Interface, is essentially a specification – like BIOS – for a software interface that connects a computer’s operating system to its firmware. It is expected to replace BIOS (Basic Input/Output System) over time, and is increasingly in use. Although implementations of UEFI do support legacy BIOS services, the spec is far advanced, and allows functionalities such as remote repair and remote diagnostics even without needing to install an operating system. Creating a UEFI bootable USB will afford a great measure of portability when you want to install, for example, WIndows 10 on a newer machine that supports both UEFI and BIOS firmware modes.
Microsoft’s Media Creation Tool
Here’s the simple way to create a UEFI bootable USB drive using a neat tool developed by Microsoft.
Step 1: Once you download the MediaCreationTool.exe file to a working PC with admin rights, double-click it and then click on “Accept” when prompted.
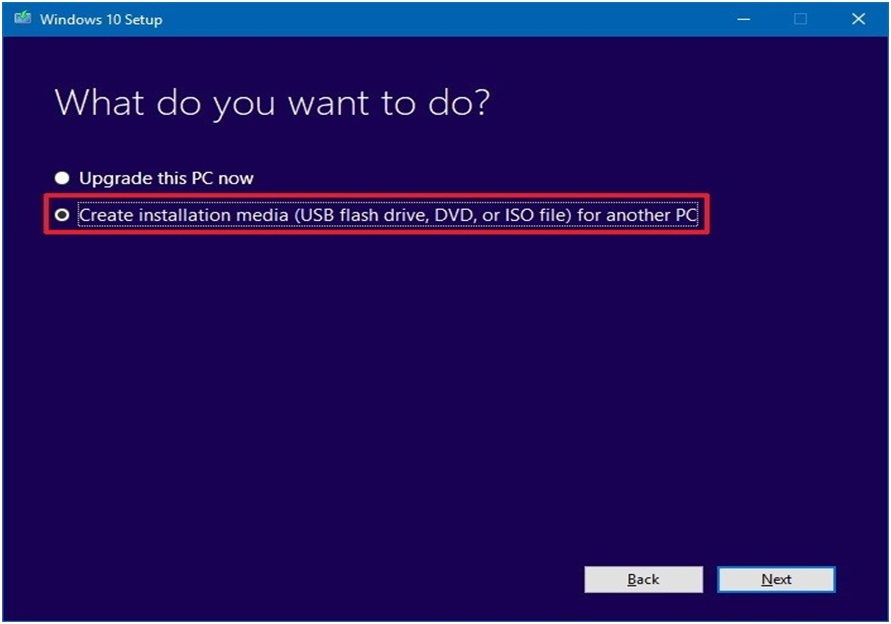
Step 2: When the PC asks you what you want to do, check the radio button for “Create installation media (USB flash drive, DVD, or ISO file) for another PC” and click on “Next”.
Step 3: By default, you will see the recommended options for version, architecture and language, but you can uncheck the box for recommended options and set your own parameters. Now click on “Next”.
Step 4: In the next windows, you can choose the USB flash drive option and again click on “Next” to proceed.
Step 5: From the list shown, select the USB drive. Remember, any data on that drive will be deleted, so if you have something on it, better back it up in advance or use a new USB drive.
Step 6: After clicking the final “Next” button, your bootable media will be created on the USB drive, and it will work with devices that support UEFI as well as those that only support BIOS.
In certain cases, the boot media that you create using the above method might not work on your computer. There could be several reasons for this, but rather than getting into the “why”, let’s look at another viable alternative to create the boot media with support for UEFI.
Rufus
Rufus is an open-source software application that’s highly portable and convenient to use when you want to create a bootable USB with support for UEFI. The portable version can be found here, and the regular version can be downloaded from here. For other versions, you can check this list here.
Rufus is fast, as the creators say. In fact, they claim that it’s about twice as fast as Universal USB Installer or Windows 7 USB Download Tool.
The interface is fairly straightforward, with no bells and whistles: just purely functional. That’s all you need, after all. And the portable version doesn’t even require an installation. Just run it from a USB disk. However, make sure that you use a second USB drive for creating the bootable media. If your computer can only take one USB device for any reason, then the regular version of Rufus will be the better option for you.
Here’s how to use Rufus
Step 1: After downloading the utility, double-click on the .exe file to launch the application.
Step 2: You’ll see a Window like the one below (but this one’s from an older version):
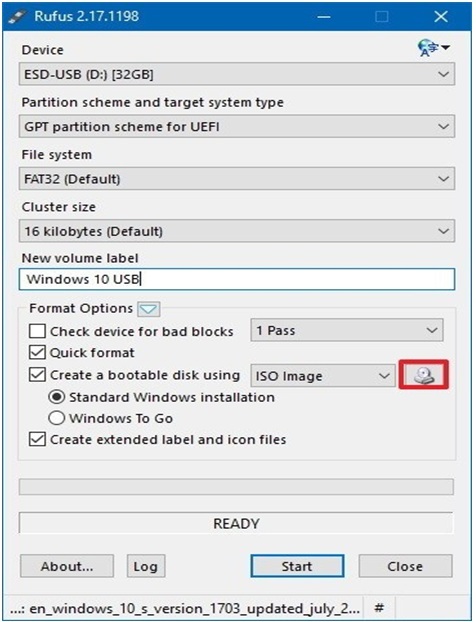
Select the appropriate parameters from the drop-down menu items, choose your source image file and so on.
Step 3: Now click on “Start” and Rufus will write the bootable media to your USB. Again, make sure there’s nothing else on that drive that you wouldn’t want to lose.
As you can see it’s a very simple process because they’ve clubbed all the parameters into one single window unlike the stepwise process used by the Media Creation Tool. It might get a little confusing if you’re doing it for the first time or you don’t have any prior experience with Rufus, but if you’ve got a little bit of technical knowledge then it shouldn’t be a problem at all.
If the first method doesn’t work, then the second one should resolve the issue, and you will have your bootable USB drive with UEFI support that you can then use for a variety of purposes. You can install Windows, you can flash a BIOS from DOS, run low-level utilities and even diagnose and repair systems that don’t have an operating system installed.