
As it is known to all, C drive is the system partition to store the system files. If you format C drive, the operating system will lose, and you can’t boot computer any more. But why there are still demands for formatting C drive? Do you know in what circumstance you need to format system drive?
Here, we summarize some common reasons for formatting C drive:
- Reinstall the operating system. When there is something wrong with your system, which leads to computer boot failure, you would choose to format the C drive and reinstall system.
- Get rid of viruses or malware. If C drive is invaded by a virus or malware, it could bring danger to the system, such as system files corruption. Then, formatting C drive is a useful solution.
- Clean original data. If you don’t want other people to view data saved on it when you intend to donate or sell the hard disk, you may format the whole disk, including C drive.
It is easy to format a partition with File Explorer or Disk Management. However, if you are trying to format C drive, you will get an error message, warning you can’t format this volume as it contains system, without which computer will stop working.
In fact, it will be not so easy to format C drive as formatting other partitions. This error message just informs you not delete it as well as system by mistake. So, how to successfully format C drive in Windows 10?
Back Up C Drive Before Formatting
Usually, something important may be stored in C drive. Therefore, you should make a backup for it before formatting.
If one-by-one backup is too time-wasting for you, you can choose a professional backup tool to do this job. MiniTool Partition Wizard is competent. Just follow the brief introduction of how to copy a C drive with this utility.
Step 1: Connect an external storage device to computer. Open Partition Wizard.
Step 2: Select C drive and click Copy Partition on the left panel.
Step 3: Choose the connecting external drive and mark the position to keep the copy for C drive. Then, follow the instructions to complete it.
Step 4: Click Apply on the main interface.
After finishing the process, you can begin to format C drive with different methods.
How to format C drive on Windows 10
Method 1: Format C Drive with Windows Installation Media
When you need to upgrade or install Windows10, you need a Windows installation media, which may be a bootable USB or CD/DVD disc. Windows 10 Media Creation Tool will be used to create a USB drive so that you can burn on a CD/DVD to install the system on a computer.
After creating installation media, please follow the 2 ways below to format your C drive.
Way 1: Use Command Prompt
You can format C drive with Command Prompt after booting from the Windows Installation Media successfully.
Normally, I recommend you to format the system partition to NTFS file system, instead of FAT32 or exFAT for better stability and higher security. The detailed steps are as follows.
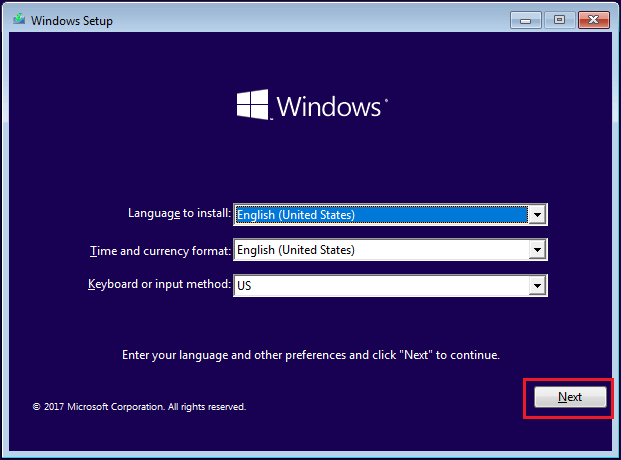
Step 1: Boot computer with Windows Installation Media. In Windows Setup window, set the language and other preferences. Click Next.
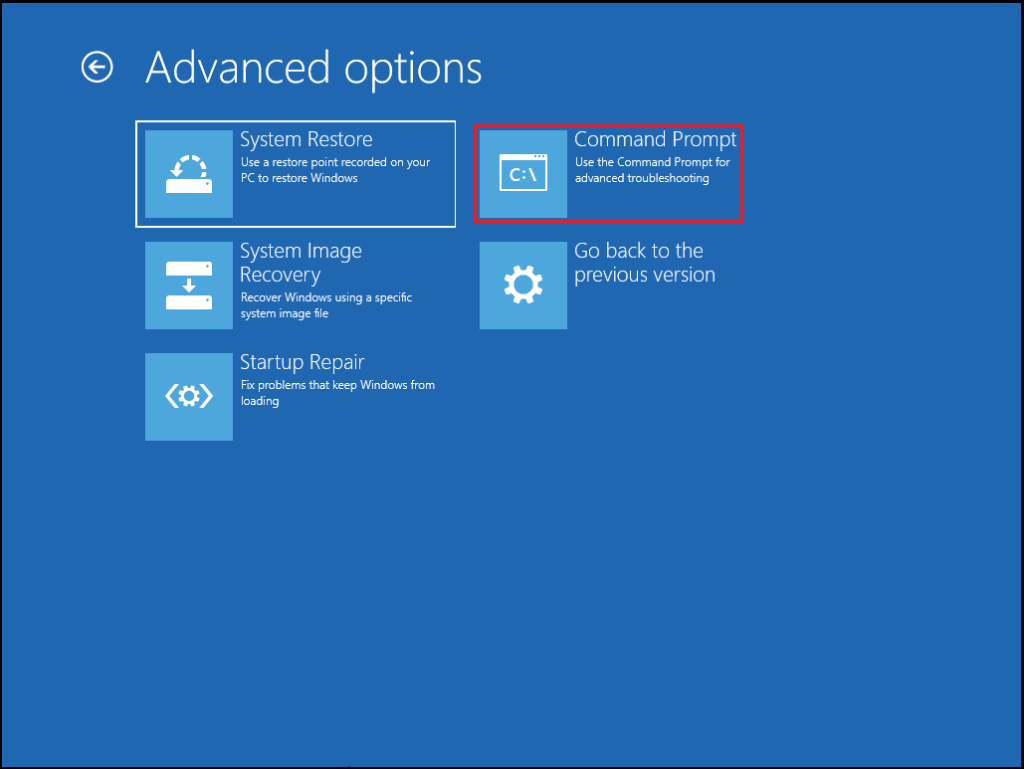
Step 2: Choose Repair your computer > Troubleshoot > Command Prompt.
Step 3: Type the command format c: /fs:NTFS and press Enter. Here, NTFS file system is recommended to the system drive.
Way 2: Format C Drive When Installing Windows
If you want to reinstall the system, there is no need to format C drive in advance, because formatting will be finished automatically during the installation process.
Step 1: Boot computer from Windows Installation Media.
Step 2: Configure the language, time and currency format in Windows Setup window. Then click Next to continue. Click Install now. Enter the product key.
Step 3: When being asked the type of installation, just select Custom: Install Windows only (advanced) to remove all data and install Windows 10 system.
Step 4: In the pop-up window, select the system partition from all partitions, and click Format.
Step 5: Complete the process of Windows 10 installation with the onscreen instructions.
Method 2: Format C Drive with MiniTool Partition Wizard
Step 1: Create a Bootable USB and Boot from It
Since we just mentioned before, the C drive can’t be formatted when the Windows system is running. In this circumstance, you have to make a bootable USB or CD/DVD with MiniTool Partition Wizard, and then, start the computer with the bootable USB or CD/DVD.
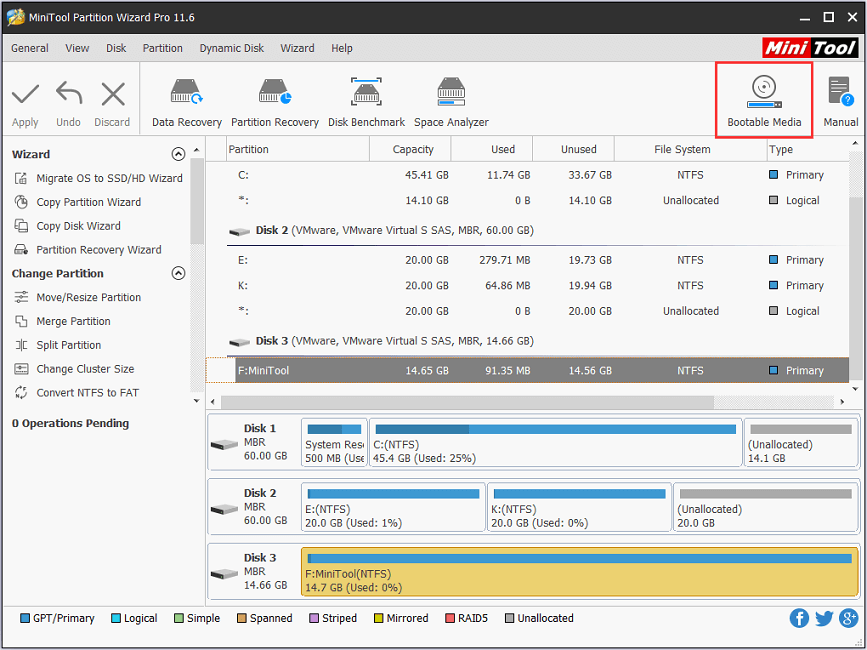
① Plug a USB drive into computer. Run MiniTool Partition Wizard and click Bootable Media.
② Choose option WinPE-based media with MiniTool Plug-in. Then, select USB Flash Disk to store the media.
③ Wait until WinPE files have been built. Click Finish.
④ Restart your computer and boot it from the burned USB drive.
Step 2: Format C Drive
① After booting from USB, MiniTool Partition Wizard Bootable Edition will be opened.
② Right click the C drive and select Format from menu. Just click Yes to go on.
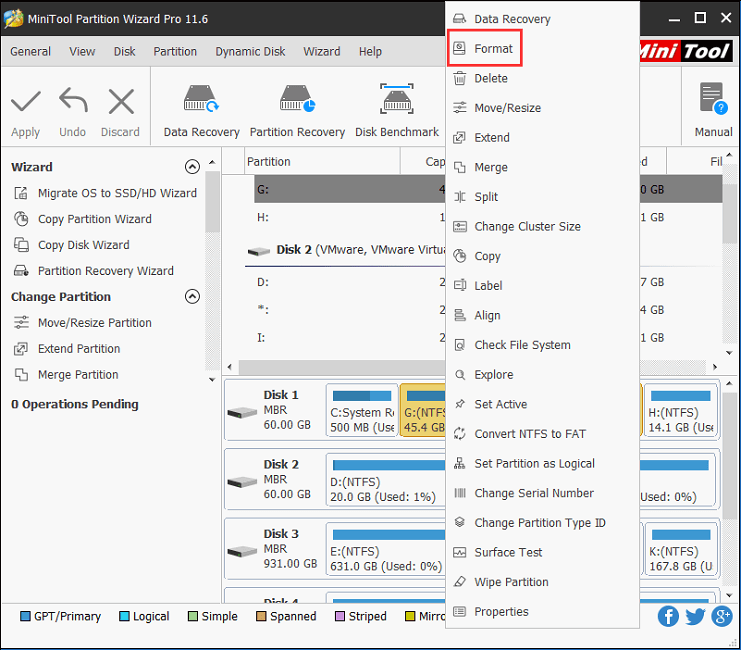
③ Set partition label, file system and cluster size.
④ Click Apply on the bottom left to execute.
Final Words
In general, there’s no need to format C drive in daily use unless you want to do it for erasing data or removing virus/malware. However, if you have to format it for installing a new system, you have the options introduced in the paragraphs above.
If you have other good ideas or any questions, please feel free to contact us by leaving comments in section below. Hope this post will be helpful.