

Microsoft Office 365 is the famous web-based email client that stores its all data in the cloud. It allows users to access data from anywhere at any time. It also provides various additional features such as file sharing, working with mobile phones, cloud services etc. But, still, there are some users who want to export PST from Office 365 Exchange online mailbox. Because Office 365 requires internet connectivity for accessing. Whenever users need to access their Office 365 data offline then, first they need to take a backup of their data items.
For backing up, it is required to save all important information in the desktop-based email client i.e MS Outlook. Therefore, an Office 365 mailbox to PST migration is needed for backup. There are some solutions given in this post which helps to export office 365 mailbox to PST with and without Outlook via PowerShell command.
Why Export Office 365 Mailbox to PST File?
There are many reasons to export emails from Office 365 to Outlook PST file. Some of the main causes are discussed here:
- If the data gets corrupted, then normally it is not possible to recover. In this situation, data can be retrieved back if users have locally saved their Office 365 mailboxes in PST format as a backup.
- Office 365 Export to PST is needed if the data stored in the Office 365 is hacked and the hacker made some irrelevant changes in the data. In this case, your data will be safe in the backup files.
- When a person has accidentally deleted some important emails of Office 365, then the lost data can be retrieved back if the backup of Office 365 mailboxes is available in the PST format.
- The migration ensures the availability of mailboxes offline for forensic analysis, compliance and regulatory needs, business continuity during the breakdown or failure, etc.
- The Office 365 data in PST format is used to archive, reuse, sharing emails, folder, and other items without any internet connectivity.
How to Export Office 365 Mailboxes to PST Files from Exchange Online Easily?
Nowadays, most of the users prefer to export their Office 365 mailbox to PST file format. Because, the Office 365 data easily becomes the target of general cyber criminal activities such as warfare, online fraud, virus or malware attacks etc. Hence, web-based email clients like Office 365 users require saving their data in Outlook PST file on the local machine. It will protect their data from any misuse in any hazard situations. In this case, people are searching for a reliable way to export PST from Office 365 Online Mailbox.
One of the best solutions for Office 365 archive Mailbox to PST is Office 365 Migration tool. This software is designed to the safe and secure migration of Office 365 emails, contacts, calendars and task to PST format. It is the simple solution to utilize, as no any technical knowledge is required to perform the migration.
Step by Step Procedure to Export Office 365 Mailbox to PST Without Outlook
This solution can be used for both MS Office 365 admin as well as the single user account. We will discuss both in this section.
With the Help of Admin Account
-
- First of all, download, install and open the Office 365 Export Mailbox to PST tool, then click on Login button.
-
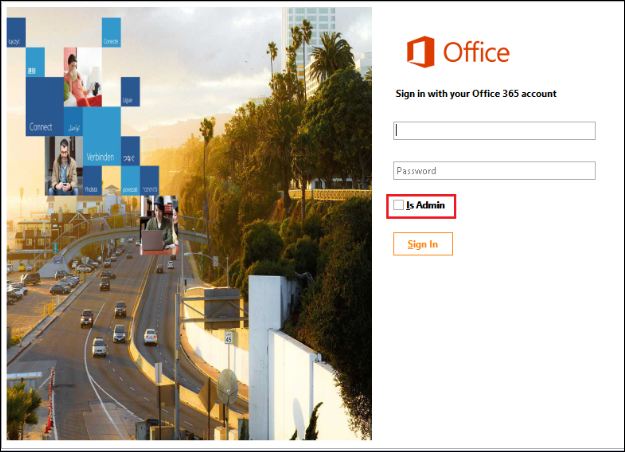
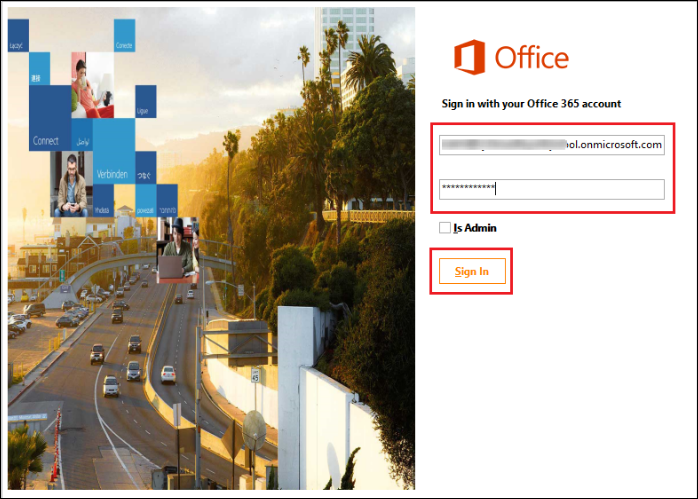
- After that, check the Is Admin option and enter all the valid credentials for an admin account. Then, click on Sign in button.
-
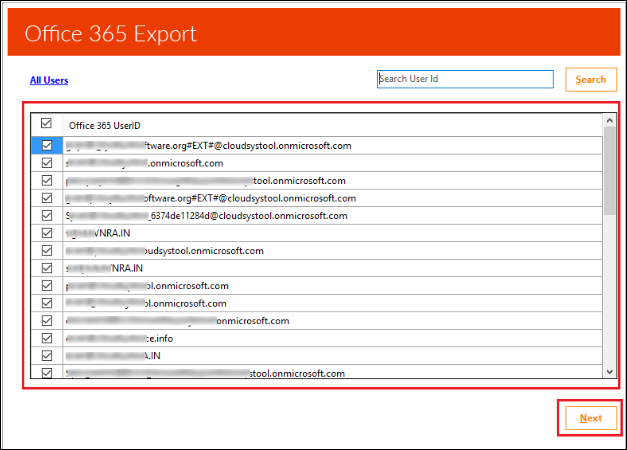
- Now, you can see all the user ids under the Admin Id. Now, select the required id and click on Next button.
-
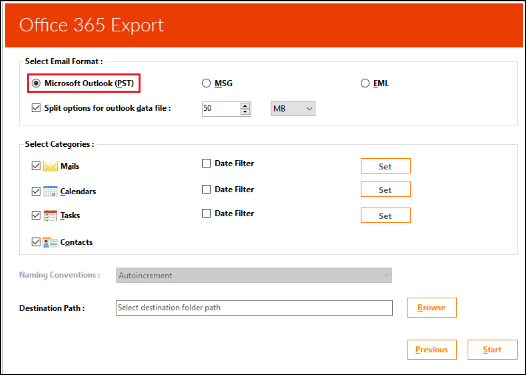
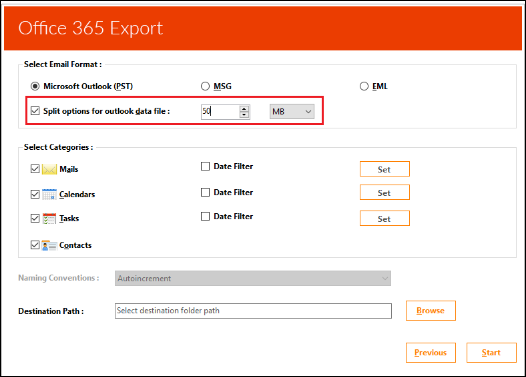
- Then, choose the Select Email Format option. Like for example, here we have chosen Microsoft Outlook (PST) from the list.
-
- Next, click on the checkbox next to Split options for Outlook data file and select the size after dividing the PST file.
-
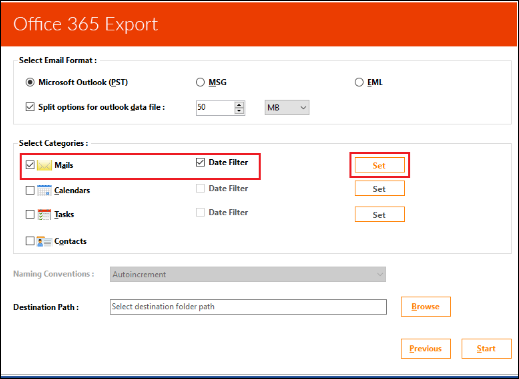
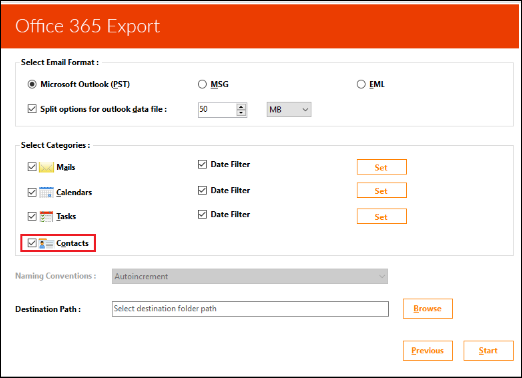
- In this step, select the categories of mailboxes that you need to export from Office 365 to PST file.
-
- If you need to migrate the emails within the specified date range, then you can also apply any filter while exporting items. For doing this, you need to apply ‘Date Filter’ option.

-
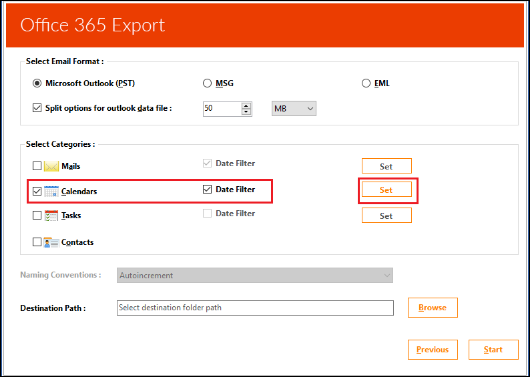
- Then, provide the dates and click on OK button.
- Now, Select the Calendars and apply date filter on it.
-
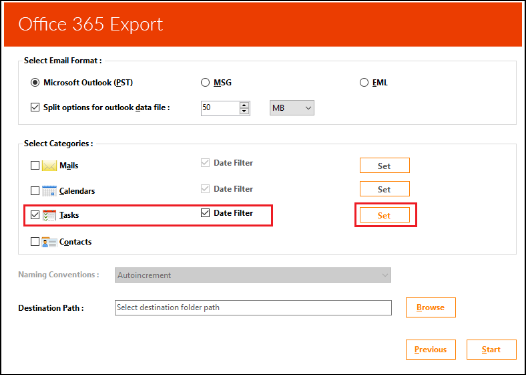
- Next, select Tasks and also apply date filter on it.
-
- In this step, select Contacts checkbox to add the contacts in the export process.
-
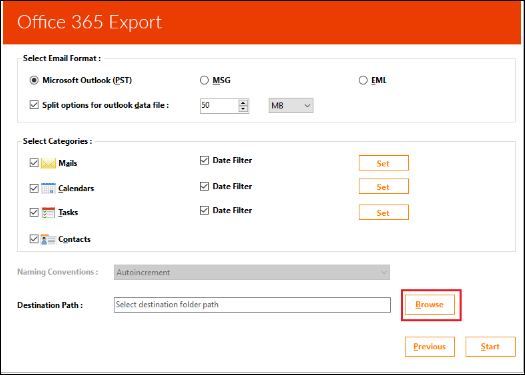
- Now, click on the Browse button to select the destination location and click on the Start button.

-
- After that, the migration process will start now.

-
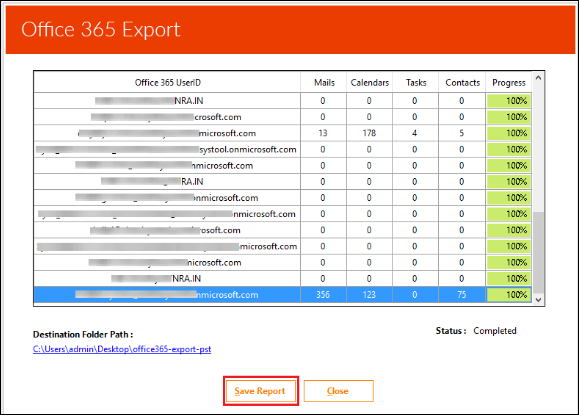
- When this is migrated successfully, then click on the Save Report button.
-
- Then, the migration report will be saved successfully.
- Finally, you can access the report by navigating to the file location.

Without Using the Admin Account
-
- At first, download, install and launch the Office 365 Export to PST tool, then click on Login button.
- Then, provide the valid credentials for the Office 365 user account and click on the Sign in button.
-
- Now, you can see the folder hierarchy for the particular id that has been added to the tool and then click on Next button.
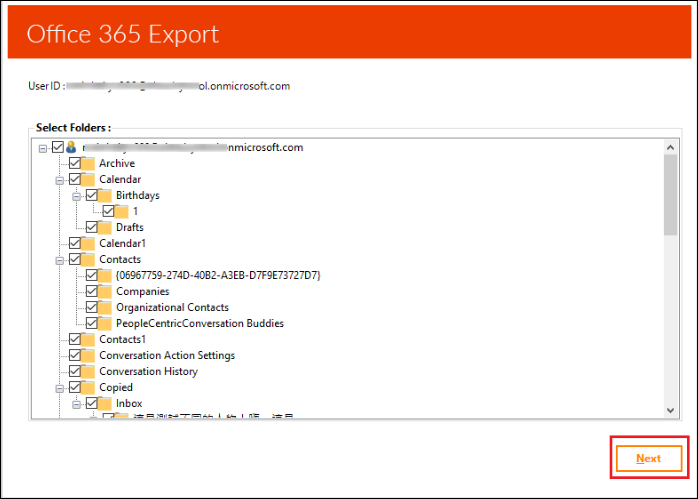
-
- Then, choose the Select Email Format option and click on the radio button next to the Microsoft Outlook (PST).
- In the next step, you can also select the checkbox next to split options for Outlook data file.
- Further, select the Mails and Date Filter option and click on the Set button.
-
- Then, provide the dates and click on OK button.
- Now, Select the Calendars and apply date filter on it.
-
- Next, select Tasks and also apply date filter on it.
-
- In this step, select Contacts checkbox to add the contacts in the export process.
- Now, click on the Browse button to select the destination location and click on the Start button.
- After that, the migration process will start now.
- When this is migrated successfully, then click on the Save Report button.
- Then, the migration report will be saved successfully.
Manual Ways to Export PST File from Office 365 Online Free
Sometimes, people do not want to use a third-party solution. In this case, there are many alternative or free manual approaches are available for Office 365 export mailbox to PST by Powershell. Some of them are discussed below:
- Using eDiscovery Export Tool
- With the help of PowerShell
- Through Import / Export Wizard
Solution # 1: Export Office 365 to PST Using eDiscovery
An eDiscovery PST Export tool is an inbuilt feature of Microsoft. It helps to transfer the Office 365 data items such as emails, contacts, calendars, etc. to a PST file format. However, it will also allow users to move the results of an In-Place eDiscovery search into the Outlook PST file. These searches may keep the data from mailboxes and public folders. It depends upon the content sources from the eDiscovery search. Moreover, by following these steps, you can easily understand the process to configure the In-Place-Hold, search for mailbox items and transfer them into PST file:
- First of all, login into your Office 365 admin portal, then go to the Office 365 Admin center.
- After that, navigate to your Exchange Admin center from Office 365 admin center.
- In order to access the eDiscovery management, you need to have an assigned Discovery Management role in the Exchange admin center. Thus, click on the Edit icon to add the necessary discovery management roles for this role group.
- Now, make sure you have added the Legal Hold, Mailbox Import Export and Mailbox Search in the Roles. By default, ‘Mailbox Import Export’ role will not be assigned to this role group. If it is not there, then add it by using the ‘Add role’ button.
- In the next step, click on the + icon from the same window and add your account in the member list. After that, click on the Save button.
- Further, go back to the Exchange Admin center and click on the Compliance Management. After that, click on the New button. It will launch the In-Place eDiscovery & Hold wizard. Here, enter the name of a litigation hold and click on the Next button.
- After that, it will ask you to choose the mailboxes from Office 365 for performing the search. Then, you should select an option to search in all the mailboxes instead of choosing the mailboxes specifically. Click on Next button to proceed further.
- Here, you can see an option to search for content in your ‘Public Folders’. You should select this option if you also want to export your Public Folder content.
- After that, you will see various filter option for filtering emails in your Mailbox or Public folders. For doing this, you need to enter the start date, end date, From, To / Cc / Bcc, and click on Next to button to continue the procedure.
- In the next step, go to the In-Place hold settings but it is not necessary for our requirement to convert the Office 365 data to PST format. So, if you want, then you can skip this unnecessary step. Otherwise, apply the settings according to your need and click on Finish button to save the In-Place hold settings.
- After saving the In-Place hold settings, you can see the search settings. It will show the data that we have saved and it will also display the progress of the search in the right pane.
- If the search process is completed successfully, then you can see the status of the search result.
- In this step, you have an option to export this search result to Outlook PST format after clicking on the ‘Export to a PST file’ button.
- Further, Click Once that is own application of Microsoft is downloaded. Browse the location to store the downloaded export files and click on the Start button to begin the export process of Office 365 mailboxes to PST.
Note: Make sure you are using the latest version of the web browser to run the application.
- Finally, you can see the status report of migration during the export process. It includes export name, the total count of mailboxes, total exported items, speed, status, export location, etc.
What if Above Solution Failed or Does Not Work?
This manual approach is not a reliable method like Office 365 Export to PST tool. It has some drawbacks that can affect the entire migration process. It is very lengthy and complex approach. Also, there are many disadvantages of this method like:
- You cannot schedule or automate the Office 365 archive mailbox to PST migration process.
- This is a premium feature that needs minimum Office 365 Plan 2 or Exchange Online Archiving license.
- You cannot particularly select the desired folder from Office 365 mailboxes to export.
Solution # 2: Export PST from Office 365 Mailbox By PowerShell Command
- To start the process, first, make a connection with the Exchange server.
- Then, provide the accessing export right permissions.
- After that, configure the Office 365 account with Outlook.
- Now, verify the configuration settings of the Microsoft Outlook program.
- Then, export PST file from recently opened email client.
- Next, check to export procedure is finished or not.
- Now, remove all the granted permissions of Step 2.
- At last, terminate the connections established in Step 1.
Solution # 3: Through Import Export Wizard
In this solution, you can see how to export Office 365 mailbox to PST using Outlook step by step.
- First, configure the Office 365 in Outlook program from which backup is to be created.
- Then, after completion of configuration, export PST file from Office 365 account, which is recently configured.
Summing Up
In the above stuff, we have discussed the best 3 manual solutions to export Office 365 mailbox to PST file format using PowerShell command, eDiscovery, and with Import / Export Wizard.
After all this discussion we found, the eDiscovery Office 365 PST export tool allows users to export PST from Office 365 Exchange online mailbox, but this process is not quick and does not work sometimes. Thus, to simplify the migration process, Office 365 export to PST tool is suggested. It will perform the Office 365 archive mailbox to PST migration in a simple, easy, and effortless manner without any hassle or data loss.